Common Ways Backyard Chickens Die and How to Avoid Them

When I first got backyard chickens I was told by many sources to get more chicks than we planned on having because not all of the chicks would live to be laying hens. While I took them seriously, I had no idea just how many chicken deaths I would have to deal with in the first year. In all honesty, chickens are really dumb. I mean really, really dumb. Our chickens free range, which means that they have a lot of room to be creative and unique in their stupidity. Even if you do everything right, they will still find a way to die, but here are some of the most common ways that backyard chickens meet their maker and how to avoid them if possible.

1. Dogs

We have lost countless chickens to dogs. Literally, countless. I don't care how nice your neighbor's dog is, even if they coexist happily with the chickens while separated by a fence, the moment that barrier is gone, they will snap the neck of every chicken in your flock and fling feathers across the whole yard. We have had our chickens fly yards with dogs, and we have had dogs dig into our yard, but the outcome is always the same. Feathers everywhere and dead chickens. Sometimes there is no good solution. For us, we couldn't rest easy until one neighbor moved away! If you want to have backyard chickens, it's just a risk you have to take.

2. Chicken Hawks

Chicken hawks are mean. They are large birds that will circle over your yard, studying your beautiful hens, and then nose dive down and snatch them right from in front of you! I have read a lot of diy ways to keep away chicken hawks (from plastic owls to shiny metallic things hanging all over) and tried most of them. The only way to really stop them is to make sure your chickens have a place to hide where they can relax- a coop, some bushes, tree cover, etc. The smart chickens will learn to take cover when the hawks are around, but like I said, smart chickens are few and far between. Once chickens get full-grown, especially if you have the heavier dual purpose breeds, they will be too big for the chicken hawks. If you have chicks or bantams, I would suggest keeping them in a coop or run that has an enclosed top until they are big enough to hold their own.

3. Eggs

Chickens can become egg bound, which means that an egg that they should be laying instead gets stuck inside of them. It cannot stay there long without the chicken dying. If you notice a chicken trying to lay but unable to, give it a warm bath as soon as possible. I know it sounds funny, but it will almost always relax the muscles enough for the egg to dislodge. If that doesn't work, you may have to go in there after it, but that gets tricky because you don't want the egg to break inside of the hen in the process.

4. Raccoons

Raccoons will be attracted by the chicken food, but will then go after the chickens. Even chickens inside of a coop will not be safe from these destructive beasts. Raccoons will reach their tiny hands through the holes in the cage and literally tear your flock limb from limb. Chickens are VERY heavy sleepers, and probably won't even wake up through this process, believe it or not! To keep the raccoons from getting to the chickens, make sure they sleep in an enclosed area that has solid walls. If your chickens like to sleep on a roosting stick next to the chicken wire, put a board over that part of the wall so that the raccoons can't reach in. Also, consider setting a trap to catch the raccoons so that you can relocate them away from your property. The price of the chickens you may lose to raccoons more than covers the cost of the trap!

5. Worms

Chickens can get worms, and particularly gape worms, which could kill a chicken if left unchecked. Learn the signs and treatments HERE to avoid losing a chicken due to this very treatable problem.

6. Water

You probably think I'm talking about dehydration, which would kill a chicken, but that isn't actually what I meant. When you have small chicks, they will often fall into their water bowl and drown, even if it is only an inch deep. Make sure to fill the water bowl with rocks so that they can sip the water from between them without falling in.

7. Gender

Even if you specifically order all hens, every now and then you may end up with a rooster or two...or eight, like we did. Roosters don't generally mix well with suburban neighbors, so this means they will not make it to adulthood. Instead of waiting until our neighbor to murder it for sanity's sake at 3 in the morning, we decided to take the initiative and turn the roosters into gumbo. If you end up with some males, it will change the number of chickens in your flock.

8. Crossing the Road

No I'm just kidding, although if my chickens got out of the back yard, they probably would cross the road and get hit by a car. However, there are many, many other random things that can kill a chicken. For example, if a chicken looks up when it rains, it will drown. Also, they tend to try to eat things that are too big for them to swallow and choke to death. Or if one chicken is injured, the other chickens will try to peck at the wound until the chicken dies. Why, chickens? Why?

To sum it up, plan on starting with more chicks that you would like to have chickens, and don't get discouraged if you have to start all over at some point. Eventually, the smarter chickens will survive and the majority of dumb ones will find creative ways to move on. If you never lose a chicken in your flock, you should get an award! A really shiny one!

Vegetable Gardening Tips for the Deep South


Alright, this is a post for all of my vegetable gardeners in the south! If you have ever read the back of a seed packet that says "direct sow as soon as the ground can be worked in the spring" and thought to yourself "what does that mean?" then this post is for you! There is a beautiful area of the United States where the temperatures rarely drop below 30 degrees F, where January can feel like a mid-spring day, where the soil never freezes, and most importantly, vegetables can truly be grown year-round without much extra effort. But seed packets and gardening books are not generally made with the deep south in mind, so here are a few changes to make when planning your vegetable garden for zones 8-10 :)

1. Don't plant cool weather crops in the spring.
There are many early spring crops that just don't have a long enough growing period before the hot weather sets in if they are planted in the fall. My suggestion is to put out cool weather plants such as broccoli, cauliflower, carrots, cabbage, brussel sprouts, lettuce, etc. into the vegetable garden in September so that they can mature and be harvested in early winter (December- January). There is just no way that you will be able to keep these plants from bolting of wilting before harvesting in June if you garden in the deep south. Besides, now that you can plant all of these vegetables in the fall, think of all of the garden space that frees up in the spring!


2. Plant fruit trees and perennial garden plants in the fall.
Most garden books will tell you to plant new fruit trees or perennial fruit, vegetable, and herb plants in the spring so that they can be well established before their first cold winter. In the deep south we have a bigger threat to new plants- the summer heat! Plant citrus trees, blackberry and blueberry bushes, asparagus, rosemary, etc. in the fall so that they have all winter to establish before the blistering summer comes.


3. Make adjustments to shade recommendations.
Many plants will be marked as needing full sun, but full sun really means 8 hours of sunlight. Even your full sun plants will find it difficult to hold their leaves up if you have them in direct summer sun for 12 hours. Move plants into areas where they will get part shade if you live in a hot climate, and plants requiring part shade can easily get away with almost full shade. Most leafy greens will thank you for the shady spot in the garden and will be slower to bolt. Also, cool season herbs can be treated as perennials if given shade in the summer.
Make good use of that shady corner of the garden!

4. Get creative with watering solutions.
Plants in hot climates need more to drink. Thankfully in Louisiana we also have a tropical climate with a lot of rain and humidity. Humid climate areas should water their plants in the morning so that the water evaporates off of the leaves and keeps diseases from spreading as easily. Hot and dry climates, on the other hand, should be watered in the evening so that less of the water evaporates during the sunlight throughout the day. Watering can be kept to a minimum if you use  drip irrigation systems connected to rain barrels (or the cheaper version, 2 liter bottles flipped upside down in the dirt with a small hole in the top). Whatever the method, make sure your plants stay well hydrated to make it through the heat wave.

5. Plan your winter break in July and August.
In the same way that many climates are too cold to plant in the most extreme part of the season, the same is true with heat in the south. Some plants thrive in the long, hot summer days, such as eggplant, peppers, okra, and some tomatoes, but most plants just can't handle the heat. Some plants, such as beans, will actually become infertile past 90 degrees F and no longer produce fruit. My lowest garden production isn't in January of February, but in July and August. Plan to take a break during these months and plan for you fall garden, starting seeds inside in the same way that gardeners up north would do in the winter. Besides, if it's too hot for the plants, it's too hot for me...

Pepper plants love the long hot days of southern summers.

6. Start your spring garden seeds super early!
While other areas are waiting for their soil to be "workable", ours plants haven't even stopped growing. I have found that the perfect time to start my new seeds indoors is new year's day. This sounds crazy early for most places, but in the deep south, tomatoes, peppers, eggplant, and more can be started in January, followed by watermelon, cantaloupe, and others in February. One year I was able to start all of my seeds outside in January with no problems, but you will get much better germination results if you start your plants indoors under lights for the first 6 weeks or so.

My tomato plants on January 15.

7. Direct sow more plants than usual.
Plants will grow stronger, healthier, and more hardy if they are direct seeded than if they are started indoors. Many places with short growing seasons don't have the luxury of direct seeding, though. However, since the soil temperature is what determines success in germination, there are a lot plants that will start just fine and develop better when direct seeded in southern vegetable gardens. Some of these plants include peas, beans, cucumbers, squash, zucchini, lettuce, kale, mustard greens, collards, and many more. Do a few tests starting some seeds indoors and then direct seeding more seed at the same time that you put your transplants into the ground. You will be surprised how fast the new seeds catch up to and even surpass your pre-started plants.

Lettuce mix

8. Plant long season crops in the fall.
There are many crops that will take up to 6 months or more to fully develop. Some of these include garlic, onions, and potatoes. These will have a much longer period to develop before the heat takes them out if they are planted in the fall instead of the traditional spring timeline. Don't worry, they will overwinter just fine! Besides, it leaves more room in your spring garden for other plants!

Onions
9. Treat some annuals as perennials.
There are many plants that are considered annuals in many areas that will act as perennials in the deep south. Some of these include green onions, collards, kale, and many varieties of herbs such as oregano, sage, and parsley. Other plants, while not perennials in the sense that you plant them once and they grow forevermore, will still grow year round. Some plants that you can plant at almost any time of year (except the extreme summer) include lettuce, carrots, arugula, mustard, beets, turnips, radishes, spinach, and many types of beans. I am continually surprised when I have some extra seeds and an open spot in the garden and decide to give it a shot even though it doesn't match the seed packet timing at all, and it turns out to be a wonderful harvest! You won't know unless you try :)

My parsley plant thriving in the middle of winter.


10. Be prepared for bugs.
The longer the growing season is and the more mild the winters, the more things survive- "things" being both plants and their pests. Bugs will abound in the southern garden, and the farther into the growing season you are, the worse it gets. This is another reason why you should plant as many of your vegetables as possible in September for a fall garden as the cooler weather will cut down on the pests. Each garden pest brings its own set of challenges, but a southern gardener must be determined and vigilant to stay on top of the many bugs that will come to visit.

Squash vine borers- PURE EVIL!

11. Plant your favorites twice.
We have such a long growing season in the south that many vegetables can be planted twice if you plan it right. You can start any of the following in both spring and fall: tomatoes, cauliflower, broccoli, beans, summer squash, zucchini, kale, lettuce, carrots, beets, turnips, radishes, arugula, cabbage, and much more. I wouldn't recommend planting everything twice, as they will really complicate your crop rotation plans and limit your space. However, if there is a certain vegetable that you just love (for me, bush beans!), then go ahead- plant it twice!

These are just a few things that come to mind, but I'm sure there are many more. 
What else would you add to the list?

Garden Vegetable Cheese Soup


I love vegetable gardening in south Louisiana! Here it is, the end of January, and while the rest of the country is snowed inside, I am harvesting the last of my cauliflower, broccoli, and carrots. (Sorry, I don't mean to brag...) And since the temperatures are beginning to drop, it is a great time for a warm, hearty garden vegetable cheese soup! So if you aren't sure what to do with the last little broccoli side shoots, those stubby end of the season carrots, or that tiny cauliflower head that you thought would eventually get bigger (but didn't), then this is a great recipe to use up the last of your cool season crops!


What you need:
- 2 stalks celery
- 1 medium onion
- 3 garlic cloves
- 4 cups chopped carrots, cauliflower, and broccoli (the proportions of each are up to you or depend on what is left in the garden, and sometimes I add more than 4 cups- you can't have too many veggies!)
- 1/2 cup butter, melted
- 1/2 cup flour
- 3 cups chicken broth
- 1 tbsp. worcheshire sauce
- 1/2 tsp. pepper
- 2 cups milk
- 2 cups shredded cheddar cheese

Put all of the veggies through the food processor to the size that you want. 


Saute the first 4 ingredients in the butter in a 3 qt. pot. 


Add the flour, stir for 1 minute until smooth. Gradually add chicken broth, stirring as you go. Cover and simmer for 20 minutes. 


Add the worcheshire sauce, milk, cheese, and pepper and cook on low for 10 more minutes. 


 All done! Serve with a fresh green garden salad :) Enjoy!


Garden Vegetable Cheese Soup
Ingredients:
- 2 stalks celery
- 1 medium onion
- 3 garlic cloves
- 4 cups chopped carrots, cauliflower, and broccoli (the proportions of each are up to you or depend on what is left in the garden, and sometimes I add more than 4 cups- you can't have too many veggies!)
- 1/2 cup butter, melted
- 1/2 cup flour
- 3 cups chicken broth
- 1 tbsp. worcheshire sauce
- 1/2 tsp. pepper
- 2 cups milk
- 2 cups shredded cheddar cheese

Put all of the veggies through the food processor to the size that you want. Saute the first 4 ingredients in the butter in a 3 qt. pot. Add the flour, stir for 1 minute until smooth. Gradually add chicken broth, stirring as you go. Cover and simmer for 20 minutes. Add the worcheshire sauce, milk, cheese, and pepper and cook on low for 10 more minutes.

Backyard Chickens, Part 1: The Basics

Backyard chickens are gaining popularity, and for lots of good reasons- fresh eggs daily! Are you interested in backyard chickens but not sure where to start? Perfect! Let's chat about chickens :)

Getting Started- What you Need

Before you get chickens, you need to have the stuff. Part 1 of chickens basics will cover all of the necessary gear to have a happy, healthy chicken flock.

Feeders

You will want to get a chicken feeder. The most common is a stand up feeder. These work well, but sometimes the chickens knock them over, in which case you may want to look into a hanging feeder. There are even fancy PVC pipe feeders if want to go all DIY on the project.

Waterers

Once again, there is the basic waterer that sits on the ground, but water can get easily contaminated when chickens kick dirt or hay in there. Also, get a large waterer because chickens drink more than you think. What we ended up using was a 5 gallon dog waterer, and our chickens love it!

Feed

When chicks are little, which is 6 weeks old or less, they eat starter feed, which is small granules. Once they are over six weeks old, chicks can eat regular pellet feed. And then around 5 months old, you want to start giving them laying feed, which has added protein for healthy egg production.

Chicken Coop

The coop can look like anything, I mean anything! You can buy one prefabricated that you assemble, build one yourself, or even contract it out. Your coop will depend on what you plan on doing with your chickens. If you are keeping your chickens enclosed, you will need about 4 square feet of coop space per chicken, plus 10 square feet of run space. The coop is the covered part of the chicken home, while the run is the area exposed to fresh air and sunlight but still fenced in. The one below is fully enclosed and would hold two full-sized chickens.

If you plan on free ranging the chickens, then the coop can be much smaller. Free ranging means that the chickens are free to roam your yard. If the back yard is fenced in, then you can have a coop that they enter and exit freely and roam the yard as they please. This is the set up that we have, and we love it. For a free range coop, you only need to make sure that you have one foot of roosting space per chicken. A roosting stick is a wooden stick (like a broom handle) for the chickens to sit on while they sleep.

Another option is a chicken tractor. With a chicken tractor, you keep a few chickens in a movable coop/run that you move from place to place in your yard each day so that the chickens can eat grass and bugs without having free range of the yard. Lots of options to think about!

Roosting Stick

We already discussed this, but you need one foot of roosting space per chicken in the coop. Any stick can be used, but wood is best for the chickens to be able to hold onto. Make sure you have a roosting stick low enough for the young chickens to reach as well as a few higher ones for when they get older. Different chickens will prefer different heights. They like to perch and sleep on these.

Other

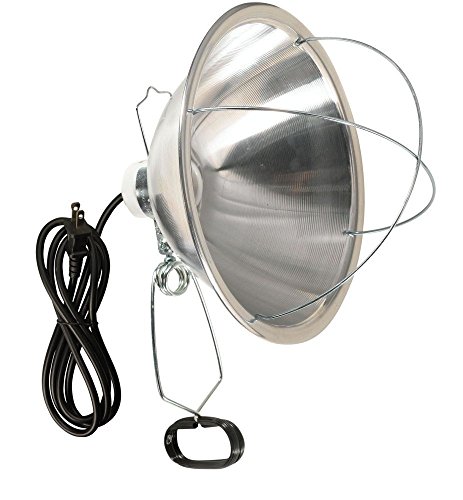
Other needs depend on how young you get your chickens. You can begin with laying hens, in which case you would need nesting boxes. If you start with eggs, you would need an incubator. If you begin with day old chicks, you will need a box with a heat lamp until they grow their feathers.

Chickens

I almost forgot! You will also need chickens! There are lots of different kinds of chickens, but that is a post for another day. There are different breeds for different things- good layers, dual purpose that can also be used for meat, cold hardy, heat hardy, different colors (chickens and eggs), loud, friendly, flighty, etc. Do some research to find the breed that is right for you.

That's the basics of what you need for chickens- it's pretty basic! But really, the best way to get started and learn is to just get some chickens and go for it!


How to Build and Maintain Rich Garden Soil Naturally


As a gardener, I get really excited about dirt. I love playing in the dirt, and I really love seeing rich dirt, full of little composted pieces of nutrient filled particles. There is just nothing as wonderful as tilling up loose rich soil to plant in the spring. I have always heard stories of people who started growing vegetables on land with terrible soil and were able to slowly build it up over time to become very rich, well composted soil. I always wondered, how is that possible? Wouldn't growing vegetables further deplete the soil of nutrients? Is it really possible to build bad soil back up to awesome, rich soil without just pumping it full of synthetic fertilizers? 

After doing a lot of experimenting with self-sustaining backyard homesteading, I have discovered how simple it is to build up the soil and keep a highly productive garden while not stripping the soil of necessary nutrients in a natural way. Here's how it works!

Think of your yard like a bank account. Everything that you do either counts as a deposit or a withdrawal in terms of nutrients. In nature, all of the deposits and withdrawals balance at the end. A tree grows leaves in spring using the nutrients in the soil, then drops its leaves in the fall which decompose back into the soil, replacing the nutrients that then go back into growing new leaves. God created a beautiful system! In your yard and garden, there is a lot of human intervention which can sway the balance to your advantage or disadvantage, depending on how you interact with the nutrients you have.

Let's look at some withdrawals that we make on our yards and think of ways to limit those withdrawals or not make them at all.

Nutrient Withdrawals
1. Mowing the grass
Grass grows using the nutrients in the soil. If you have a lawnmower that spits the grass back out, then those nutrients go back into the soil and you're fine. If you have a mower that bags the grass and then you leave it at the street to be picked up, you are gathering up your nutrients and throwing them away! Bagging the grass is still fine (we bag our grass) but don't let it go to waste! Use it as mulch around garden plants or put it in your compost pile to be used in the garden later.

2.  Bagging leaves
This is the same idea as the last one. When you rake up leaves, don't bag them and leave them at the street- use them as mulch around plants or compost them. If you don't care what your yard looks like, you could always leave them on the ground and let them decompose right where they are. Consider mowing the leaves to mulch them into little pieces so that they decompose even faster.

3. Growing vegetables
When you grow vegetables in the garden and then eat them, you are making a withdrawal. Since this particular withdrawal is the reason we even care about nutrients in the first place, it is the most necessary one we make. By all means, eat all the vegetables! There are other nutrient-consuming parts of growing vegetables that we don't eat, though. What about all of the plants that you pull up at the end of each season?


4. Prunings, Branches, and Sticks
At the end of each season when cutting back bushes, trees, and perennials, chop up all of that stuff and put it in your compost rather than putting it out at the street. If you trim trees or end up with a lot of sticks and branches, the easiest way to keep some of the nutrients is to have a bonfire and add the ashes to your compost. If you want to keep even more of the organic matter in your yard, buy a mulcher and run all of your branches through it (leaves and all!) to add to your compost pile. The mulcher we bought on craigslist gets a surprising amount of use at our house.

Basically anything that grows in your yard and then goes somewhere else is a withdrawal, including the fruits and vegetables that you eat. Now let's look at ways to make deposits back into the yard.

Nutrient Deposits
1. Composting
Instead of throwing away organic matter, keep a small compost pail by the trash can to collect your kitchen waste- fruit peelings, vegetable ends, and egg shells- and put them into your compost pile. There are nutrients all around you that other people are throwing away that can be yours, too! When your neighbor puts out their grass clippings or leaves, drag it to your compost pile and dump it in there! My neighbor, after seeing us do this several times, now puts his bags over the fence into our back yard instead of at the street. After we have dumped them in the compost, we put the empty bags back over the fence until next time. If my neighbor wants to make a withdrawal from his yard and put a deposit into mine, I won't stop him :) You can also get compostable material from stores. Most coffee shops collect and save their coffee grinds for individuals to pick up for free. Some grocery stores throw away old produce, but will keep some aside if you ask them. All of this is great to toss into your compost pile. Check around your area- you will be surprised how much organic matter is thrown away that can be yours!

2.  Mulch
Many places have free mulch available through the city. The city picks up all of the branches, leaves, and grass clippings, mulches them into huge compost mountains, and then offer free truckloads of mulch to anyone living within the city limits. We have gotten LOTS of free mulch over the last few years to build up our soil. So if you got excited about taking your neighbor's leaves, you should be thrilled to know that you can now have a helping of the whole city's leftovers!

3. Store bought dirt
I rarely buy bags of dirt. If you compost a lot then it may not ever be necessary, but every now and then the garden expands faster than the compost pile can support and we have to buy a few bags of dirt. Store bought dirt doesn't have a high content of organic matter in it, but adding it is still better than nothing.


4. Manure
Animal poop is great for the garden! Why? Think about it- they eat up all the organic matter and then spit it back out into a compact form of nutrients that are already broken down! If you have a friend with a horse, cow, goats, etc. see if they will give you their manure. Most people with large animals have more than they know what to do with, and will give it to you free if you offer to get it yourself. Just remember to compost new manure for around six months before using it in the garden. This natural fertilizer is so hot it will burn your plants!

5. Fertilizer
I try to avoid this at all costs! As long as you know and understand the deposit/withdrawal cycle and make good use of what's around you, you may avoid this altogether. If the soil is so depleted that you must bring in fertilizers to give it a jump start on the road to recovery while your compost matures, look into organic fertilizers. I like my dirt as natural as possible.

Creating a Self-Sufficient and 
Highly Productive Nutrient System

Now that you know which things are withdrawals and deposits, let's look at creating a cycle that can repurpose as many nutrients as possible to get the most out of them and wasting as little as possible. There are ways to introduce other components into your yard that will create systems of nutrient self-sufficiency!

1. Chickens
A great way to give nutrients back to your lawn naturally is to free range chickens. Chickens will eat the weeds and some of the grass, as well as bugs and insects, and in turn deposit those nutrients (in the form of poop) all over your yard. While free range chickens eat a lot less feed, it is still important to buy some high protein laying feed for eggs or regular feed for meat chickens. The feed you buy and add into the system counts as the deposit that will balance out the withdrawal of you eating the eggs or meat. You will also buy some hay to put in the bottom of the coop, and when you clean that out it all goes in the compost for another deposit. Chickens play a role in transferring matter efficiently while also producing more food for you!

Withdrawals- eating grass, eating bugs, laying eggs for you to eat, becoming meat for you to eat
Deposits-  feed that you buy for them, poop in the yard, hay bought to put in the coop


2. Rabbits
Rabbits are amazing little composting machines! And an added bonus is that rabbits are one of the few animals whose manure you can put into the garden immediately- no composting or waiting necessary. While you can put your green plants in the compost to break down, a much faster way is to feed it to a rabbit. When I pull up old plants in the garden (broccoli, tomatoes, beans, you name it!) I feed it to my rabbits. Then I scoop out that manure from under the cage the next day and till it back into the garden where I pulled up the plants. That's a one day turnaround of green plant to nutrients in the soil for the next season of planting! On top of that you will buy rabbit feed as another deposit into the system. We grow our rabbits for meat (an added level of productivity), but if you don't want to go that far rabbits make great pets and will do the same job.

Withdrawals- Meat that you eat, eating garden greens
Deposits- Best poop for gardens, rabbit feed


3. Aquaponics
I won't go into all the details of aquaponics here, but aquaponics is a system of using container raised fish (more specifically their poop) to fertilize plants growing in water rather than dirt. The plants clean the water which cycles back to the fish in a completely self-sustaining system that grows fish and vegetables with the only input of fish food! If you have never heard of it, do a little research- it's awesome!

Withdrawal- Fish to eat, vegetables
Deposits- fish food

4. Bees
Bees are sneaky little nutrient ninjas! They fly around and take all of your neighbor's pollen (I don't think they will miss it- besides, they do them a favor by pollinating everything) and then bring all of the bounty back to your house where they turn it into honey and beeswax. This system creates a lot of output for a little input while increasing the productivity of all of your plants by pollinating them.

Withdrawal- honey, beeswax
Deposit- your neighbor's pollen

5. Goats
Backyard dairy goats can also play a role in nutrient making. They will be a fats composter for leaves and tree branches in the same way that rabbits are for all things green. The food you buy is a deposit for the manure they create as well as the milk and/or meat that you will get out of the system.

Withdrawals- Making milk, meat, eating leaves
Deposits- Feed, poop

Each time you add a new animal or system to your yard, the cycle becomes more complex, but also more complete. You will be amazed how adding just one animal to your yard will transform the way to use and recycle the organic matter to create even more output for the input while keeping your nutrient balance stable.

Do you have any other ideas to add to the list of deposits and withdrawals? What creative ways do you use to build up your soil?


Cauliflower Mozzarella Sticks


I saw something that caught my eye on pinterest by The Iron You this morning- cauliflower breadsticks! I am a true skeptic when it comes to all of these recipes that sound so healthy that you just know they taste weird at best. This sounded like one of those. But I had been proven wrong with my recent experimenting with cauliflower alfredo sauce, so I thought I would give it a shot. Besides, I just harvested LOTS of cauliflower from the garden, and I had to make something for family night that my mom, who recently went gluten free, could enjoy with us. Solving two problems at once? Let's do this!

Cauliflower Mozzarella Sticks:
- 1 head cauliflower (about 3 cups of flowerettes)
- 1/2 cup mozzarella cheese
- 1 egg
- 1 tbsp. olive oil
- 1 tsp. garlic cloves
- 1/4 tsp. salt
- 1/4 tsp. pepper
- 1/4 tsp. dried basil
- 1/4 tsp. dried parsley
- 1/4 tsp. dried oregano


Cut the cauliflower into pieces and chop up into fine pieces in the food processor.


Microwave the cauliflower "rice" for 8 minutes until fully cooked. 
Put the cooked cauliflower in a tea towel and strain out all of the water (this step is important to get the right consistency later). You will really have to twist the towel to squeeze out all of the liquid. 


Mix all of the ingredients in a bowl together.


Spray the loaf pan with Pam and put the mixture into a loaf pan, pressing down until it is packed into the bottom of the dish.


Bake in the oven on 350 degrees for about 20-30 minutes until golden brown. Sprinkle a little bit more mozzarella on top and let it melt as the sticks cool. 


Once the sticks are completely cool, it will be easy to remove them from the loaf pan and use a pizza cutter to make slices. Enjoy with some marinara sauce!


So, how were they? O...M...G....delicious! I will have a really hard time eating steamed cauliflower ever again now that I know it can taste like this! While it doesn't have the consistency of a breadstick (fluffy and bready) it tastes awesome! The consistency is more like a hash brown, but full of herbs, garlic, and cheese! LOVE IT! Let's just say, DH will be lucky if there are any left for him to try when he gets home :)


Cauliflower Alfredo Sauce


We just harvested a bunch of cauliflower and had to think of some creative ways to use it all. I saw a recipe on myfridgefood.com for a cauliflower alfredo sauce, so I decided to give it a try!

What you need:
- 6-7 cups of water, chicken broth, or vegetable broth
- 3 tablespoons butter
- 3 tablespoons minced garlic
- 5-6 cups cauliflower flowerettes
- 1/2 cup milk (optional)


Bring the water, chicken broth, or vegetable broth to a boil. Add the cauliflower, cover, and simmer for 10 minutes until flowerettes are tender. 


Use a slotted spoon to transfer the cauliflower along with one cup of the broth into a blender. Blend the cauliflower and liquid until smooth.


In a large skillet, melt the butter and simmer the garlic in it for a minute or two. Add the cauliflower from the blender stir until smooth. If desired, add milk and stir until smooth once again. 


Simmer for a few minutes and then serve over noodles! You will notice that my sauce turned out more yellow than white, but that is because I used a mix of white and yellow cauliflower. (Imagine if I had used some of the purple cauliflower!) The color will look more like regular alfredo if you use a more traditional color of cauliflower.


I know what you're thinking, because I was thinking the same thing- this sauce is made of cauliflower...there is no way it can taste good. I was wrong. It was delicious! Even my husband, who describes himself as a "meatasaurus" said that is was, and I quote, "very good"! Now THAT is saying something :)

If I could change anything for next time, I would add a few sun dried tomatoes and a little parsley on top of each serving and possibly add some grilled chicken or shrimp to get some protein in there. However, even by itself, the flavor of the sauce was surprisingly amazing, especially when you consider that it is 1/10 of the calories of regular alfredo sauce! If you are feeling daring, give it a try :)

How to Preserve Citrus Slices

We had a bumper crop of satsuma oranges this year. Even after eating all that we could, giving some away to anyone who would take it, and making 24 jars of

satsuma jelly

, we still had more! I thought it would be nice to preserve some whole slice to use in salads or to just eat later in the year when we don't have any fresh citrus left. It turns out to be a really simple process! We used satsumas, but this can also be done with clementines or mandarins.

What you need:

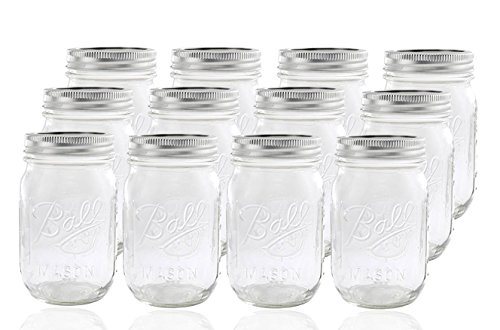
- Sterilized canning jars and lids

- Sugar

- Water

- Citrus slices

Pick your citrus and peel it, separating it into segments. Depending on how much you are canning, this process may take a while. I am pretty fanatic about getting off all of the little white pieces which turn bitter when canned. If you have a lot to make and are as particular about that as I am, you may want to put on a movie and get comfy for this part. 

Once that is done, the rest of the process goes really quick. Cold pack the citrus segments into the sterilized jars. Really cram them in there! Then make a syrup by boiling a ratio of 2.5 cups of water to 1 cup of sugar. (You can play with this ratio if you want to make the syrup more or less sweet to your taste.) 

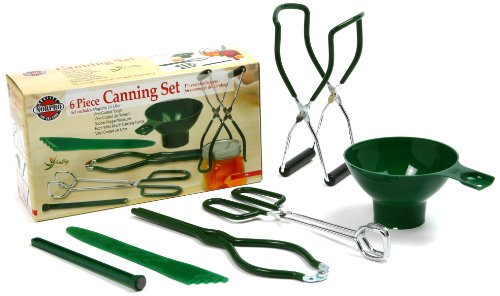
Pour the liquid in the jars over the fruit until full. Screw on the lids tightly. Finally, put the jars in a boiling water bath for 30 minuets. For the water bath, put the jars into a pot of boiling water that covers the tops of the jars by at least 1 inch.

And now you are done! You have some delicious citrus segments to use throughout the year, even when your fresh fruit isn't in season! I can;t wait to use this in a salad over the summer with some dried cranberries and pecans on top!

Satsuma Jelly Recipe

One of the wonderful things about growing your own fruit is having fresh fruit in-season for free. The problem comes when you have WAY more than you can eat or give away! Of course this is a good problem to have, but for those who don't want great fruit to go to waste, it is time to get canning!

This recipe would probably work with many different kinds of citrus fruits such as clementines or mandarins, but we used a Louisiana favorite- satsumas! Satsumas are the jewel of the humid south. They are easy to peel, usually seedless, very sweet and produce like crazy! We ate two or three a day for months and then had to figure out what to do with the rest before the first hard freeze.

What you need:

- 3 1/2 cups Satsuma juice

- 5 cups sugar

- 1 1/2 teaspoons lemon juice

- 1 package Sure-Jell

- canning jars and lids

Makes 6 half pint jars.

Pick a LOT of satsumas and peel them, then juice them. We used a juicer to do this and ended up with a lot of waste, so if you are making just one batch instead of four like us, I would juice them by hand the old-fashioned way.

Once you have all of your juice and other ingredients ready mix the satsuma juice, lemon juice, and box of Sure-Jell in a sauce pot with tall sides. Stir continuously until you have a rolling boil for one minute (rolling boil while still stirring, that is). Then add the sugar, still stirring, and bring to a boil once again for one minute. 

Ladle into sterilized jars, put on the lids and boil in a water bath for 10 minutes. Once you take the jars out of the water bath, let them sit for 24 hours to cool and jell properly. It was a pretty simple process, and the result was a beautiful, sweet, and slightly tangy jelly that I can't wait to spread on a steaming hot biscuit!

I was so pleased with the results and it came out perfectly jelled! I hope your batch comes out just as tasty!

Reasons to NOT refrigerate fresh eggs


Did that title just say to NOT refrigerate eggs? Isn't that unsanitary??? I'm also going to tell you not to wash them. Don't leave just yet- I'm not crazy, and have very good reasons for this advice!

Guess what? When I got back yard chickens, I learned something that I had literally never heard of before- NOT refrigerating eggs! For anyone living in the United States, this idea is shocking, but for the rest of the world, it is old news.

First, let me tell you why Americans DO refrigerate eggs. Eggs can carry salmonella, and storing eggs at room temperature is the best environment for it to multiply. But storing them at room temperature is not the source of the salmonella, just the growing environment. Where does it come from?
Salmonella is significantly more likely (as in, off the charts) to appear in eggs from: 
1. Large flocks of hens (thousands of them)
2. Unsanitary conditions (such as cages stacked on top of each other)
3. Close quarters (usually about 1 square foot of space per chicken)


As it turns out, most of the eggs produced in the United States meet all three of those conditions. Because the eggs are produced in such an unsanitary environment, the eggs go through a thorough washing and bleaching process before showing up at the grocery store. This seems like a good idea considering where the eggs came from...

The only problem is that chickens lay eggs with a natural protective coating that keeps bacteria out. When eggs are washed, this protective coating is removed, making the eggs more susceptible to entering pathogens. The solution? Store the eggs in a refrigerator where the bacteria is less likely to exist. 
It seems like every solution along this track only causes another problem. If we take things back to a simpler time, the problems solve themselves, which allows me to keep my eggs out on the counter with no worries.


The Alternative
If you are raising backyard chickens and are producing your own eggs, then you probably don't have thousands of chickens. My flock is currently ten chickens, and that is way more that enough for us. As a result of a small flock, they most likely have plenty of space to peck around without sitting in each others' poop and growing diseases all day. When they do lay eggs, you are able to pick them while they are nice and clean, still having the chickens protective coating on them. If they don't need to be washed, then they can be safely stored out on the counter for a MINIMUM of 21 days.


Why 21 days? When chickens lay eggs, they lay a large clutch and then sit on them to warm them in order to hatch them. From the first egg of the clutch being laid to the last before being sat on is usually around 21 days, which means eggs were designed to last at least that long in original condition. Eggs can last longer than that, but 21 days is the minimum. 


So why are eggs on the counter better than eggs in fridge? For me, fridge space is always a precious commodity, so having a little extra is great (especially if you are getting a couple hundred eggs each month), but there is more to it than that.

You may have seen baking recipes that call for room temperature eggs. Eggs at room temperature (and especially ones that have never been refrigerated) bond with the ingredients differently and form air pockets that expand during baking which make lighter and fluffier baked goods, especially breads. This also makes a big difference when whipping egg yolks to make a meringue- definitely fluffier with room temp eggs.


If for some reason you get a few eggs that are really gross (sometimes chickens are just not careful about where they poop) then I would definitely recommend washing them and putting them in the fridge. But other than that, fight the urge to do what you've been told to do all your life, and let those natural eggs stay natural!

So what do you think? Are you willing to take the challenge with your backyard eggs?

Simple Dehydrator Kale Chips


I'm so excited about the dehydrator I got for Christmas! The first thing I wanted to make was some crispy kale chips. I have made kale chips countless times in the oven, but the always come out just a little singed or still a little soggy. WHile I would settle for that with no dehydrator, I am glad to now be able to make the perfectly crispy kale chip.

What you need:
- Kale leaves
- Olive oil Pam spray
- Sea salt

Start with a fresh batch of kale leaves from the garden. Wash them well and let them dry.


Coat the leaves with olive oil. The first batch I did I rubbed with olive oil until completely coated, but they took twice as long to dehydrate as they were supposed to. For the second batch I used the Pam olive oil spray to lightly coat the leaves. Perfection! (and probably healthier...) Hand sprinkle some salt over the leaves. 


Lay out the leaves on the dehydrator sheets, making sure that they don't overlap. Set the dehydrator on medium for 3 hours (or in a humid place like Louisiana more like 5 hours...) You will know they are done when you hold them up by the stem and they stand straight without flopping over at all. When crushed between your fingers, it should crunch and crumble like a perfect kale chip!


Oh my goodness! Kale chip perfection! That crunch...that hint of salt...and silky smooth olive oil. Just writing this makes me want to go make another batch! I'm definitely addicted.


Roasted Pumpkin Seeds


This recipe is so easy and dee-licious! I know, I'm just getting around to roasting the pumpkin seeds from the pumpkin from October, but at least I got to it before the new year. Before you throw away your decorative pumpkins next year, wait until after you make this tasty snack!

What you need:
- Pumpkin seeds from 1 pumpkin (about 2-3 cups)
- 1/3 cup Butter, melted
- Sea salt

First, the messy part- cut open the pumpkin and pull all of the seeds out of the slimy insides. Put the seeds in a strainer and wash them really well to get off all the slimy orange pumpkin pieces. (Optional: feed the rest of the pumpkin insides to the backyard chickens waiting for their treat).


Next, wait for the clean pumpkin seeds to dry. At first I laid them out on a baking sheet. After waiting for a few hours with not much progress (or patience on my part) I tossed them in the dehydrator on the sheet for liquids and they were crispy dry in less than half an hour.


No matter how you do it, once they are completely dry, toss the pumpkin seeds in 1/3 cup melted butter. Spread the mixture out on a baking sheet so that the seeds don't overlap. Well, do the best you can, they are slippery little things, and they love to overlap. Sprinkle the whole pan with salt to taste.


Bake on 350 degrees for 20 minutes until golden brown and crunchy. Once they cool off, go ahead and eat them by the handful! They are so good! Crunchy and salty, plus full of protein. DH and I love to sprinkle them on salads instead of croutons :) 


To keep them fresh and crunchy, store them just sitting out on the counter without covering them. I know this sounds strange (especially for us in our humid climate) but it definitely works. This tasty snack probably won't last a week, but they will stay good and crunchy for up to a week just sitting out on the counter. Hope you enjoy!!!

Homemade Hot Sauce


I had a bunch of peppers leftover from my mini pepper plants over the summer, and I have been debating what to do with them. I used some to make pepper jelly, but it was SO spicy. I tried adding just a few into a jar of salsa, and talk about some KICK! They were too hot to really do anything with, so I decided to make a batch of good ole' homemade Louisiana hot sauce :)


I adapted this recipe from one I found in the book Little House in the Suburbs (great book, btw).

What you need:
- 1/2 cup white vinegar
- 3/4 cup apple cider vinegar
- 1/2 cup tabasco peppers with the stems cut off
- 1 tsp salt
- 1/2 tbsp garlic

Simmer the salt, peppers, and vinegar for 5-10 minutes. Make sure to do this in a well-ventilated area.
WARNING: It is best not to breathe at all if possible during this step. If you must breath, you may want to put your shirt over your nose and mouth. You probably also want to turn off your AC or heater, because when that thing kicks on in the middle of the project and those potent fumes start swirling around, it's not good! (Not that I know from experience...)


Next, take the mixture off the heat, cover it, and let it cool. Take this time to air out the house. Or just go outside and take some deep breaths without feeling like your throat is burning.


Once it is room temperature, add the garlic and blend the mixture in a food processor until sludgy. When you open the top of that food processor, it is another good time not to breathe.


Then pour the sludge through a fine sieve to strain out all of the skins, pulp, and seeds.


Then pour it into a bottle and keep it refrigerated. It should stay good indefinitely! I made three batches, which gave me 1 3/4 olive oil bottles. I guess I could have measured it in cups before pouring it...oh well.


I was just curious to see if my chickens, who eat literally anything, would be interested in the leftover pulp. It smells so strong!


Yep, they ate it all...


How to Harvest and Make Ground Ginger


As I was cutting back all of the dead summer plants in my garden this winter, I had Christmas on the brain. Cutting my ginger plants, which have such lovely and potently fragrant white blooms during the summer, got me wondering if ground ginger (and gingerbread cookies!) could somehow be derived from my ginger plants. A little research soon uncovered that ginger root and ground ginger do come from the beautiful flower that I happened to have as a decorative plant in my garden!

It turns out to be a simple process, so I decided to share! Also, I got to use three of my Christmas presents in the process (mandoline, dehydrator, and electric food mill). Love, love, love new kitchen gadgets!

In case you are wondering if you have it in your garden as well, there are several different varieties, but my plants look like this:

After the ginger plants die back in the winter, it is the perfect time to harvest the root, which is actually a rhizome, to use as a spice for different recipes. You will want to dig up a few of the rhizomes that are from the previous year's growth rather than the new growth that just started in the past spring. Either will work, but the older the rhizome, the stronger the flavor will be. I had a few rhizomes growing out of the garden into the yard, so I started with those.


After digging up a few and rinsing them off, I was ready to get started on the experiment! As you can see, these rhizomes still have some green on them as they are younger, but the older ones will have a completely brown skin.


 Peel off the skin off with a vegetable peeler. The inside will have a thick, white, fibrous texture. Some recipes call for ginger root, and you would use the ginger at this point for those recipes. But for recipes calling for ground ginger, we continue the process.


 Use a mandoline slicer to create thin slices. Side note- mandolines are amazing!


Put the slices in a dehydrator on medium for about an hour. I was surprised at how fast the ginger dried! It ends up looking like paper thin sawdust curls.


 Put the completely dehydrated ginger flakes in a food mill or coffee bean grinder.


 Grind for a minute or so until most of the ginger is a powder.


Shake the powder through a fine strainer or sifter to separate out any pieces that didn't chop up fine enough.


And what you have left is ground ginger! You can store it in an airtight glass container or spice jar. I can't believe the price I have been paying for ground ginger and ginger root while I had it growing in my backyard all along! Go figure.


What about you? Do you have any ginger in your yard???

DIY Decorative Magnetic Chalkboard

This has been one of my favorite projects that I have made this year! It is a magnetic chalkboard in a decorative frame with a touch of shabby chic-ness! There are quite a few steps to make this, but here goes...

What you need:

- wooden plate frame

- plaster of paris

- acrylic paint

- paintbrush

- sandpaper or sanding block

- 9 in. baking tin

- chalkboard spray paint

- chalk

- ribbon

- decorative fabric flower, feathers beads, etc.

First you will need a wooden plate frame. A family member of mine used to collect those painted plates with scenes from different movies, etc. Well, to go along with these collector plates, they had boxes of wooden plate frames. So, you will need one wooden collector plate frame.

Lay your frame on some newspaper. Now it is time to paint it with some homemade chalk paint. You can buy chalk paint, but mixing your own is cheaper, and you can choose from any color of paint! To make chalk paint, simply mix your choice color of paint with a little bit of plaster of paris. I couldn't tell you the proportions because I usually just go by the consistency, which is different for each paint. You don't want it so chalky that it is clumpy- it should still be smooth, but thicker than regular paint.

Once your chalk paint is mixed, put a thick coat on your frame. Only one coat of paint should be necessary with the chalk paint. Don't get too perfectionistic with your paint job, you are going to be sanding it off in the next step anyway! Let it dry completely.

Now take some fine grained sandpaper or a sanding block and sand down the chalk paint so that the wood shows through along the edges of the frame. This should look like natural weathering, so it will be uneven and rustic looking. Be sure to use the wood's natural rises to your advantage to give it more depth. Here are two frames side by side of before and after the sanding.

Brush off the paint dust and get ready to make the chalkboard part! What makes the adorable magnetic chalkboard center of this decorative frame? A simple dollar store 9 in. baking tin.

Take your baking dish and spray paint the back side of it with chalkboard paint. Make sure the pan is completely covered with a thick coat of paint. It is better to do several thin coats letting each coat dry before adding the next to get the best effect.

Then attach the baking tin to the frame. The frames already come with hardware on them. I take all of it off, saving the screws and the hanger to use again later. Use a hammer and nail to punch five holes in the lip of the baking tin- one on each side, one at the bottom, and two at the top the exact distance of the holes in the hanging hardware. 

Use the screws saved from before to screw the baking tin into the frame with a hand held screwdriver.

Now you should have a completed frame!

Next you can add any decorative touches that you want. I use fabric flowers, beads, and feathers. Hot glue your decorative touches to the frame. I also add a piece of chalk tied to a ribbon that is glued to the frame so that something to write with is always handy!

There are lots of different designs that you can make using these plates frames. The magnetic chalkboard is my favorite, but I have tried several other designs as well.

You can use sheets of cork to create a corkboard.

Or you can slice wine corks and glue them onto fabric covered cardboard to create a corkboard with a little more dimension.

I think these plate frames are the perfect decorative touch for any home as well as keeping organized! Which one will you make?

DIY Picket Fence Boot Rack


Our latest little homestead project was making a boot rack to organize all of our outdoor shoes that tend to pile up by the back door. Since our chickens free range, the shoes that we wear in the backyard, are used ONLY for the back yard. So when we take them off at the door, it turns into a piled mess of old tennis shoes, boots and flip flops. Enter new idea for a boot rack to keep it organized so I don't trip over them getting to the door :)

We used some leftover supplies that we had leftover from other projects, so it isn't for looks- just function at this point.

Supplies:
- 1 part of a section of picket fence
- 2 2x4x8 boards
- 3 fence boards
- wood screws

First we cut the section of picket fencing we had leftover so that it was only 4 pickets long. Next, I custom measured pieces of the 2x4 to go out from the fence at the bottom to equal the width of 2 fence boards. Then I measured 2 more pieces to use as vertical stabilizers and screwed them all together.

Next I cut 2 of the fence boards to the length of the base and screwed them on top (actually DH handled all of the power tools).


 Next we cut some short pieces of 2x4 to create the brace for the top shelf. We measured so that it would equal the width of one fence board, and then screwed them together.


 We added the top shelf onto the supports, and then added a screw into the back of each picket to make the whole thing a little more sturdy.


 All done! Took less than half an hour! Not bad for a Saturday afternoon project. I will probably paint it later...maybe next Saturday.


Fabric Paint Stamped Tea Towel

A friend of mine has an adorable house, and it is difficult to give a decorative gift to someone with an adorable house, because everything always looks perfect! If you need a gift for a person like this, don't give up and buy a gift card just yet! These super cute and trendy fabric stamped tea towels are a great idea. They are custom made, so you can fit the colors and designs to any decor, and even a non-crafty person can create a memorable gift for

yourself

 a friend.

What you need:

- Cotton linen tea towels

- Martha Stewart Tintable Fabric Medium

- Acrylic paint

- Rubber stamps

- Ruler

- Pencil

- Foam brush

- Waxed paper

To make these adorable stamped tea towels is an easy project. First gather all your supplies- choose which paint colors you want to use and which designs of stamps. Next think through the design that you want to put on the towels (the possibilities are endless!). I did four different designs for this particular project. 

First pre-wash, dry, and iron the towels to have a clean surface to design. Next, lay out the design. I measured where each stamp would go in advance, and marked those spots with a pencil, making a tiny dot.

I also put my towel on top of a plastic tablecloth, just in case any paint bled through!

Take your first color of paint and mix it with the tintable fabric medium. Make sure to shake both well before using. When mixing the two together use a 1 to 1 ratio of paint to fabric medium.

After you mix the paint, I use a foam brush to paint it onto the shiny side of waxed paper. I then put the stamp into the paint on the paper to make sure that the paint is evenly coated on the stamp before stamping it onto the fabric. You could also paint it onto the stamp with a brush, but I like the waxed paper method.

Carefully stamp your design where the dots are marked, making sure to recoat the stamp with paint in between each stamp on the towel. You may want to practice stamping the paint on paper before you go to the fabric, just to get the hang of it!

Use as many colors and designs as you would like! Cleanup between colors is easy- just rinse out your stamp and brush with warm water. Since the paint is acrylic, rinsing it off is a breeze!

Once you are finished, let the towels dry for 24 hours. I know...waiting. 

After that, you have to heat set the designs to make them permanent. This is the most boring part. Iron on the wrong side of the fabric using a DRY iron (steam could smear the design) set on medium to high heat.  Iron in small sections, making sure that each section is heated evenly for 3-5 minutes. Yes, add up those minutes in your head and you will realize that 4 towels took over an hour. So, put on some music or a movie, get comfy, and iron away.  

Once the design is heat set, the towels are finished! The are machine washable and dryable on the delicate cycle. Now these tea towels are ready to take your kitchen cuteness to the next level! The great thing about this project is that you can use this same method on anything fabric- pillow cases, shower curtains, table runners, cloth napkins, curtains, throw pillows, table cloths, lampshades, Christmas tree skirts, etc. So once your kitchen is cute, start custom designing everything else in the house!

How did yours come out???

How to Cut Costs on Rabbit Feed


Raising meat rabbits is a great way to grow and process your own meat for urban homesteaders. They are quiet, don't take up much space, multiply quickly, and are very cost efficient. After the initial set up of cage and watering and feeding systems, the only cost for raising rabbits is the feed. While the feed isn't too expensive, (about $15-$20 for a 50lb. bag), there are some simple ways to cut even these costs pretty significantly.

Rabbits can live healthy lives in captivity with up to 90% of their diet consisting of greens and natural materials. By feeding them greens, they have a more balanced, varied, and natural diet for your rabbits. Here are a few easy ways to cut food costs with minimal effort.

1. Trees and Leaves
My rabbits love eating leaves from trees. We have several "trash trees" that grow little saplings around the edge of our yard. No matter what I do to cut them back, I can't seem to kill them for good. Once I got rabbits, I started cutting off the new shoots and small branches and putting them in the rabbit cages. They nibble off all the leaves, and then we put the wood through the mulcher to add to the compost. Not only does this replace pellet feed, it adds mulch to the compost, and keeps my icky weed trees in check. They can't grow faster than my rabbits can eat! Also, after a storm sometimes branches of bunches of leaves will fall out of my oak trees, and the rabbits love those. So I just gather them up and fill the cage :)


2. Weeds
Weeds always annoy me because they take nutrients from my plants, are a pain to pick, and can't be composted unless you want them all to multiply. Lose, lose all around. But with rabbits, weeds can actually serve a purpose to replace feed. When I weed my raised beds, I put all of the weeds in a bucket, and then dump it into the rabbits cages. They LOVE eating weeds, and I love having a place to dispose of them where I know they wont end up back in the garden :)

3. Kitchen Scraps
I have always composted my kitchen scraps, but now I divide my scraps into to different containers- one for the compost pile (which usually becomes chicken food) and one for the rabbits to eat. Rabbits will eat carrot, radish, and turnip tops, any vegetable ends like celery, and some fruit rinds like watermelon and pineapple. Oddly enough, lettuce isn't good for rabbits, so just toss that in the compost. You may be wondering how your compost pile will ever grow if you feed it all to the rabbits, but trust me, rabbits compost these items MUCH faster than the compost pile would, and they make meat while they're at it!


4. Garden Waste
At the end of a season when pulling up your plants, instead of tossing them in the compost, toss them to the rabbits. My rabbits favorites are the leaves and stalks of bean, peas, sweet potatoes, tomatoes, cauliflower, broccoli, cucumbers and peppers. The only thing I have found so far that they didn't like was green onions. Also, sometimes I have plants that get destroyed by bugs and can't be eaten or that have leaves at the base of the plant that turn yellow. I trim these leaves off and give them to the rabbits as well. Giving them too much of one kind of plant all at once can mess with their digestive systems, so I usually pull a few plants a day for several weeks instead of emptying the garden all at once.


5. Lawn Clippings
We have a lawn mower with a bag so we can collect our lawn clippings. We put most of it into the compost (where the chickens happily slurp up the trimmings), but we also put some in a bowl in each of the rabbit cages. They love grass (go figure) and will eat as much as I put in there.

6. Prunings
At the end of each season, I cut back all of my plants, pruning, dividing, etc. This is a great time to find some treats for the rabbits. My rabbits eat banana leaves, ginger, and fruit tree trimmings just to name a few. I would look up some of the plants in your yard before giving it to them just to be sure, but most things make a great treat for the rabbits.


7. Free Ranging
My rabbits love to hop around in the back yard and nibble in the grass. We try to take the rabbits out of the cages every so often and let them run around in the fenced in yard. We do have to stay out with them to keep an eye on them, but they love the freedom to hop around, play with the chickens, and nibble all the different things on the ground.

Some of the plants that I feed my rabbits can supposedly cause diarrhea, but I guess it depends on your rabbits because mine have never had any problems. Keep an eye on your rabbits though to see is they have a bad digestive reaction to any plant in particular.


Food Determines Mood
Now that we have been feeding our rabbits greens pretty regularly for a year now, we have noticed that they have become much more friendly and cuddly, especially our breeders. They ignore when we fill up the pellet container and wait at the cage door for their treats. The greens are what they really want! Now, raising the baby rabbits for meat on mostly greens will slow down their growth rate, so I would give them greens in moderation if you are on a time schedule, but for the breeders, the more greens the better!

Do you have some tips for cutting the cost of feed for your meat rabbits? Feel free to share!

12 Days of Anticipation: Day 12 God's Unstoppable Plan


Day 12- God's Unstoppable plan

Everything that happens next in history is Satan's attempt to stop God's plan from unfolding, and God outwitting him at every step! Herod tried to kill Jesus by murdering all of the baby boys, but God sends the family safely to Egypt. Satan uses Jesus' own disciple, Judas, to betray Him to His death, but that death was His very plan all along. The guards try to keep the body from being stolen, but Jesus rises from the dead! The chief priests try to cover it up with a lie, but Jesus appears to many people before ascending to heaven. The chief priests arrest, torture, and kill many of the disciples to keep them from preaching, but the church grows every with day. The story continues throughout thousands of years of history- Satan attempting to stop this spread of the truth that life and hope can be found in Jesus, and truth prevailing all the same.

This is why we celebrate Christmas! This is why we live our lives for Christ every day. This is why we believe so many things that are contrary to this world- that to die is gain, that those who mourn are blessed, that persecution brings joy, that we should love our enemies. You are a part of God's continuing plan. Each generation has its own challenges to face in spreading the good news that the angels announced that Christmas night, but this is our time. Right now we are on the front lines. Some days it may seem that the world is too dark, that hope is too far away, that there is not enough strength to fight it, but that is exactly what the enemy wants you to think. The story continues...

What role do you play in God's unstoppable plan?
In what ways have you allowed Satan to keep you from spreading the truth about the significance of Jesus?
Have you been distracted by the world and kept from doing your task?
How can you be more intentional in the new year about sharing life and truth with others?

I hope you have a merry Christmas, celebrating and rejoicing in the amazing and miraculous birth that we stop to recognize. Glory to God in the highest, and on earth, peace to those on whom His favor rests!

Click on the pictures to read the other days!
Previous Day                                                             First Day

12 Days of Anticipation: Day 11 Giving Gifts


Day 11- Giving Gifts

And now we come to the one part of the Christmas story that society has taken hold of- presents! The idea of giving gifts came from the three gifts that the wise men gave to Jesus as a young child- gold, frankincense, and myrrh. These were not the typical gifts given to a child, but each one represents who Jesus is. The gold is the gift for a King, and Jesus is the King of Kings. Frankincense was an incense burned at the temple as a sacrifice to God, showing that Jesus is God. And myrrh was an oil used in embalming dead bodies- it foreshadowed the death that Jesus would undergo to forgive our sins. While it may seem that the wise men were the ones giving the gifts, it turns out that their gifts only reflected the true gift that was given- Jesus coming to earth.

Society has turned Christmas into a consumer holiday marked by all time highs for shopping with an emphasis on giving that perfect gift to everyone on your list, and not forgetting to buy for yourself along the way. But really, Christmas was always meant to be about giving, not buying. God gave us the greatest gift, and we can share what we have with others because of that gift. We can give gifts of time, attention, compassion, joy, patience, resources, energy, talents, and so much more. We should give all of ourselves to those around us every day of the year because God gave us his only son, and Jesus gave us His life so that we could have life in Him. WHat do we have that doesn't come from him? Could we ever outgive what God has blessed us with? Do we really have a right to anything that we consider ours? We are only stewards, charged with the task of taking what we are given and passing it out. If we take what we are given to only give to ourselves, we miss out on the purpose that God has for us.

What are some things that you can give this year?
In what ways do you find yourself believing that what God has given you is for you?
Take some time to thank God the gift of His Son for us.

Click on the pictures to read the other days!
Previous Day                                                                  Next Day